Required permission:
- View integration
- Create integration
- Azure AD Subscription: A valid Azure AD account with administrator privileges.
- Platform access: Access to the administration settings.
- Application Registration: An application registered in Azure AD for the platform.
Step 1: Register the application in Azure AD
- Log into the Azure Portal: Navigate to Azure Portal.
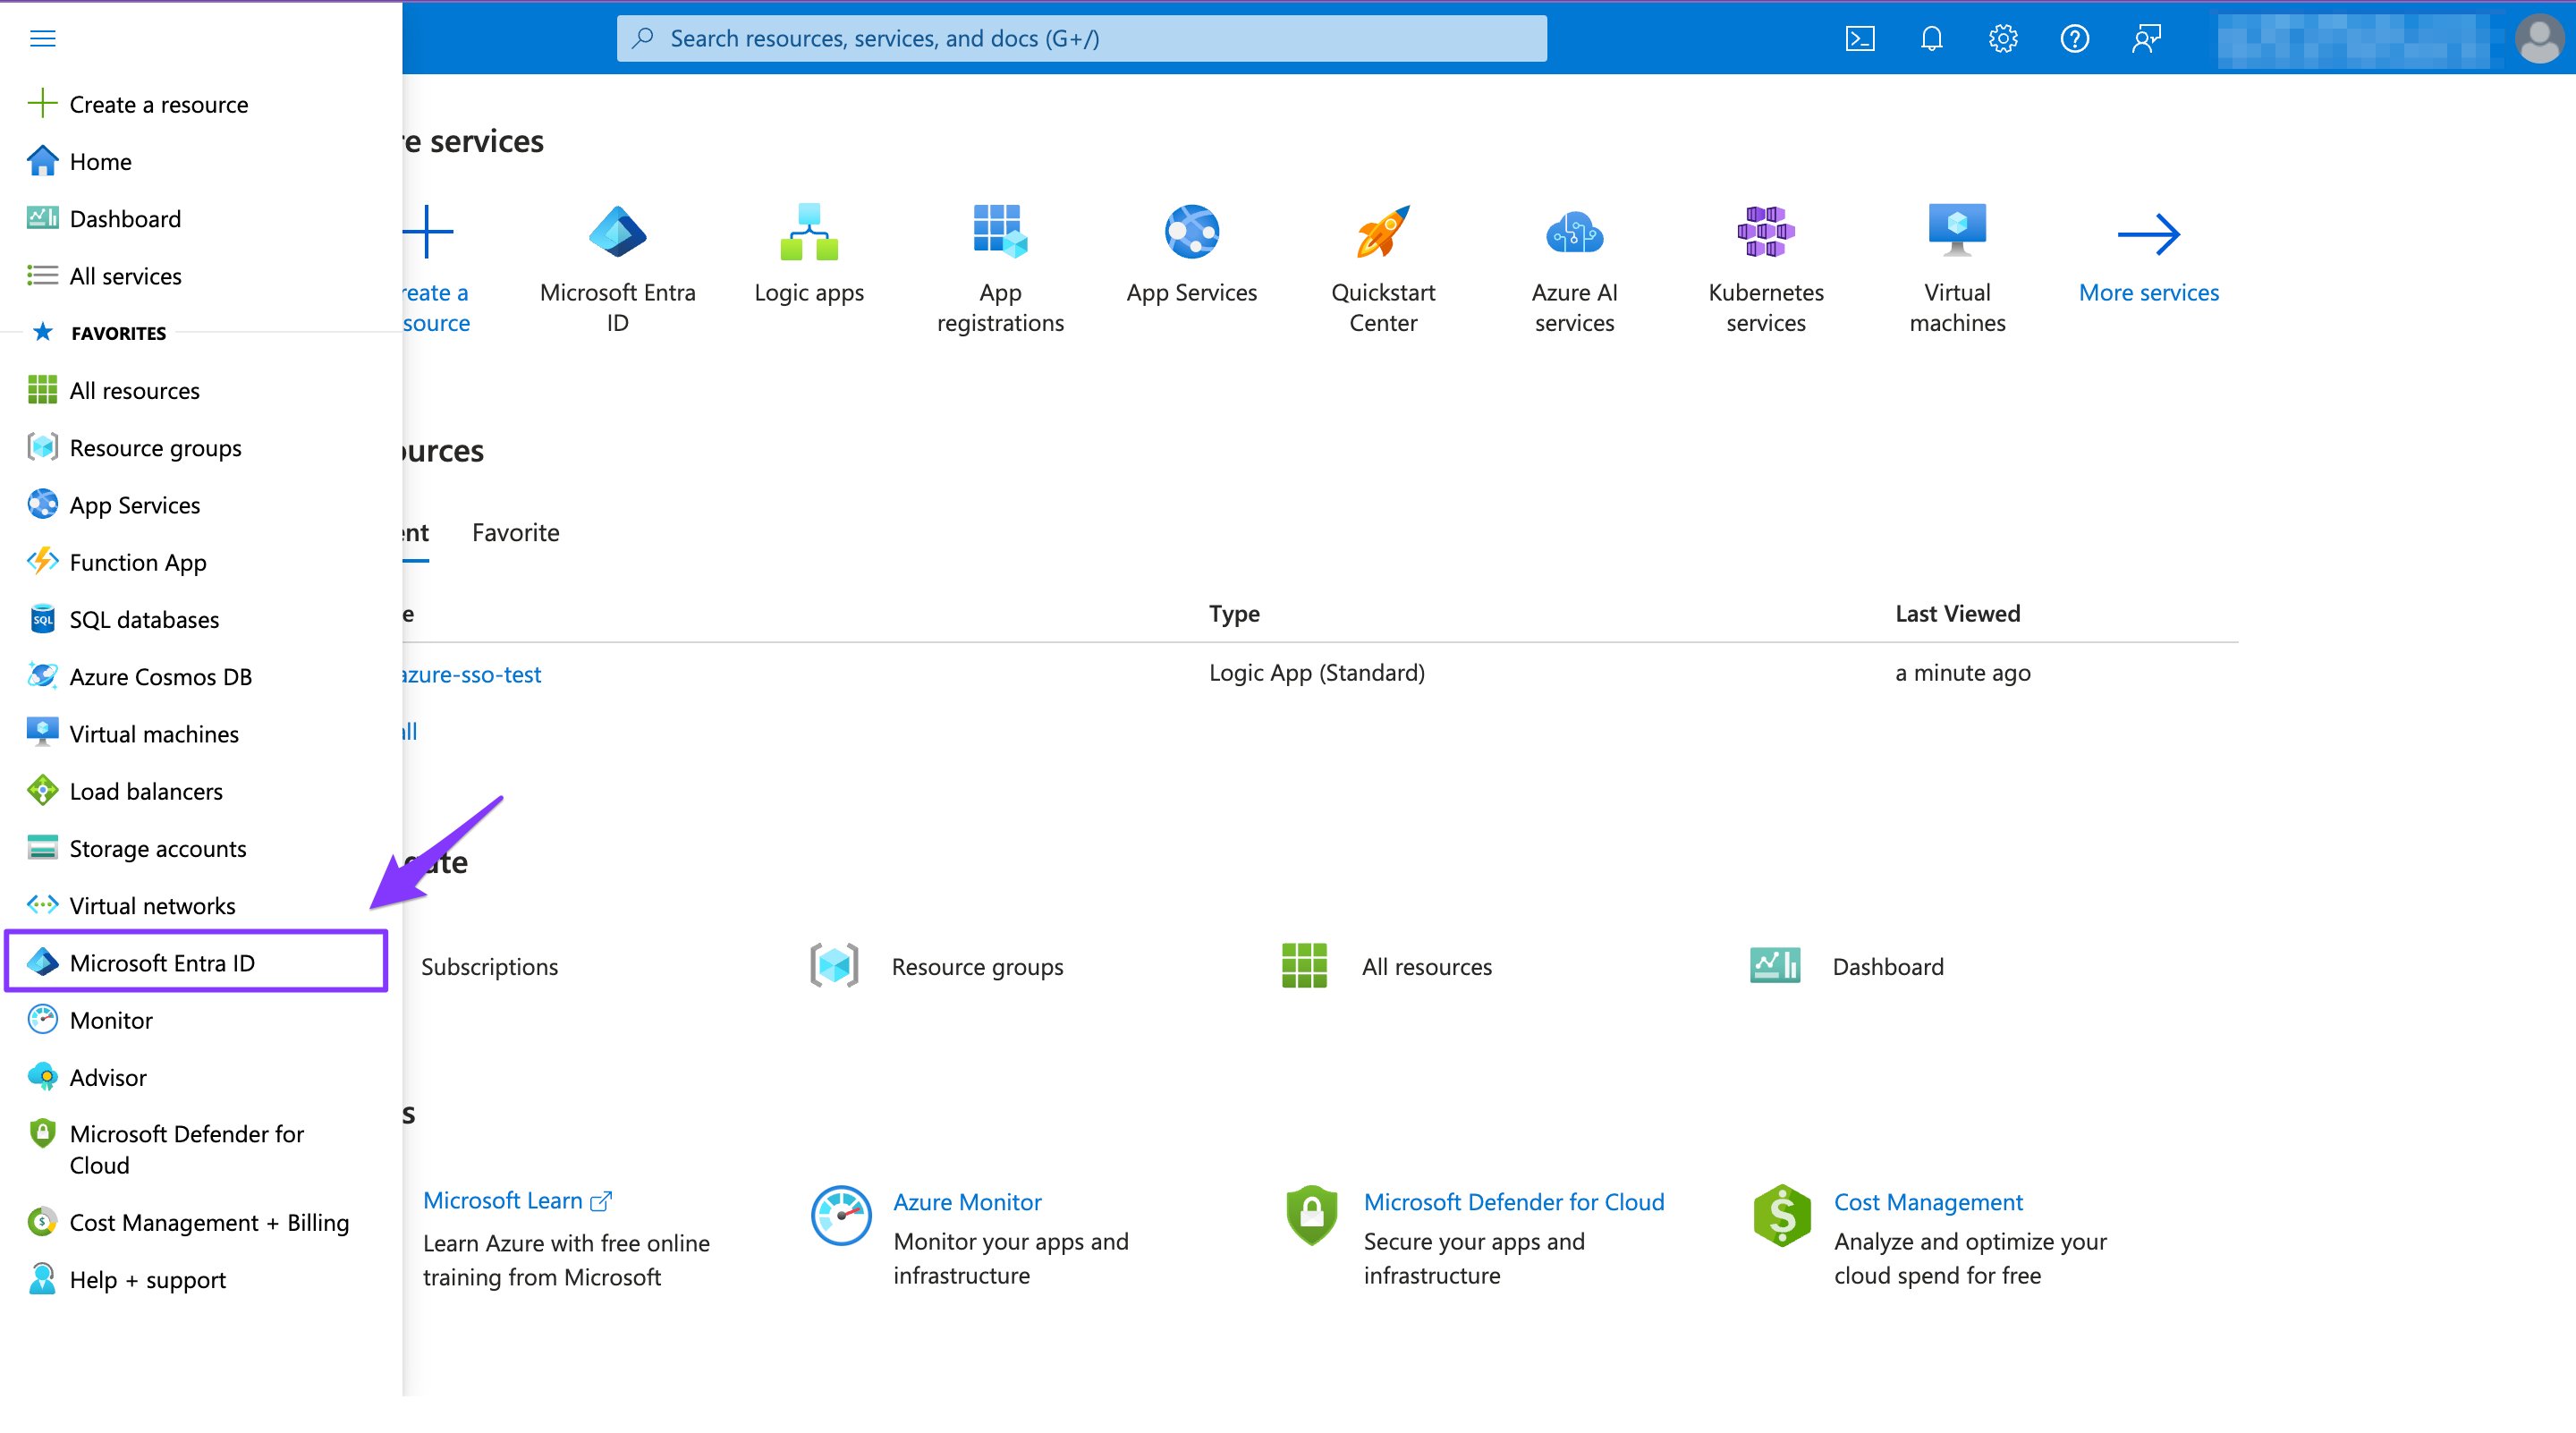
- Create a New Application:
- Go to Azure Active Directory ➝ All aplication ➝ New application.
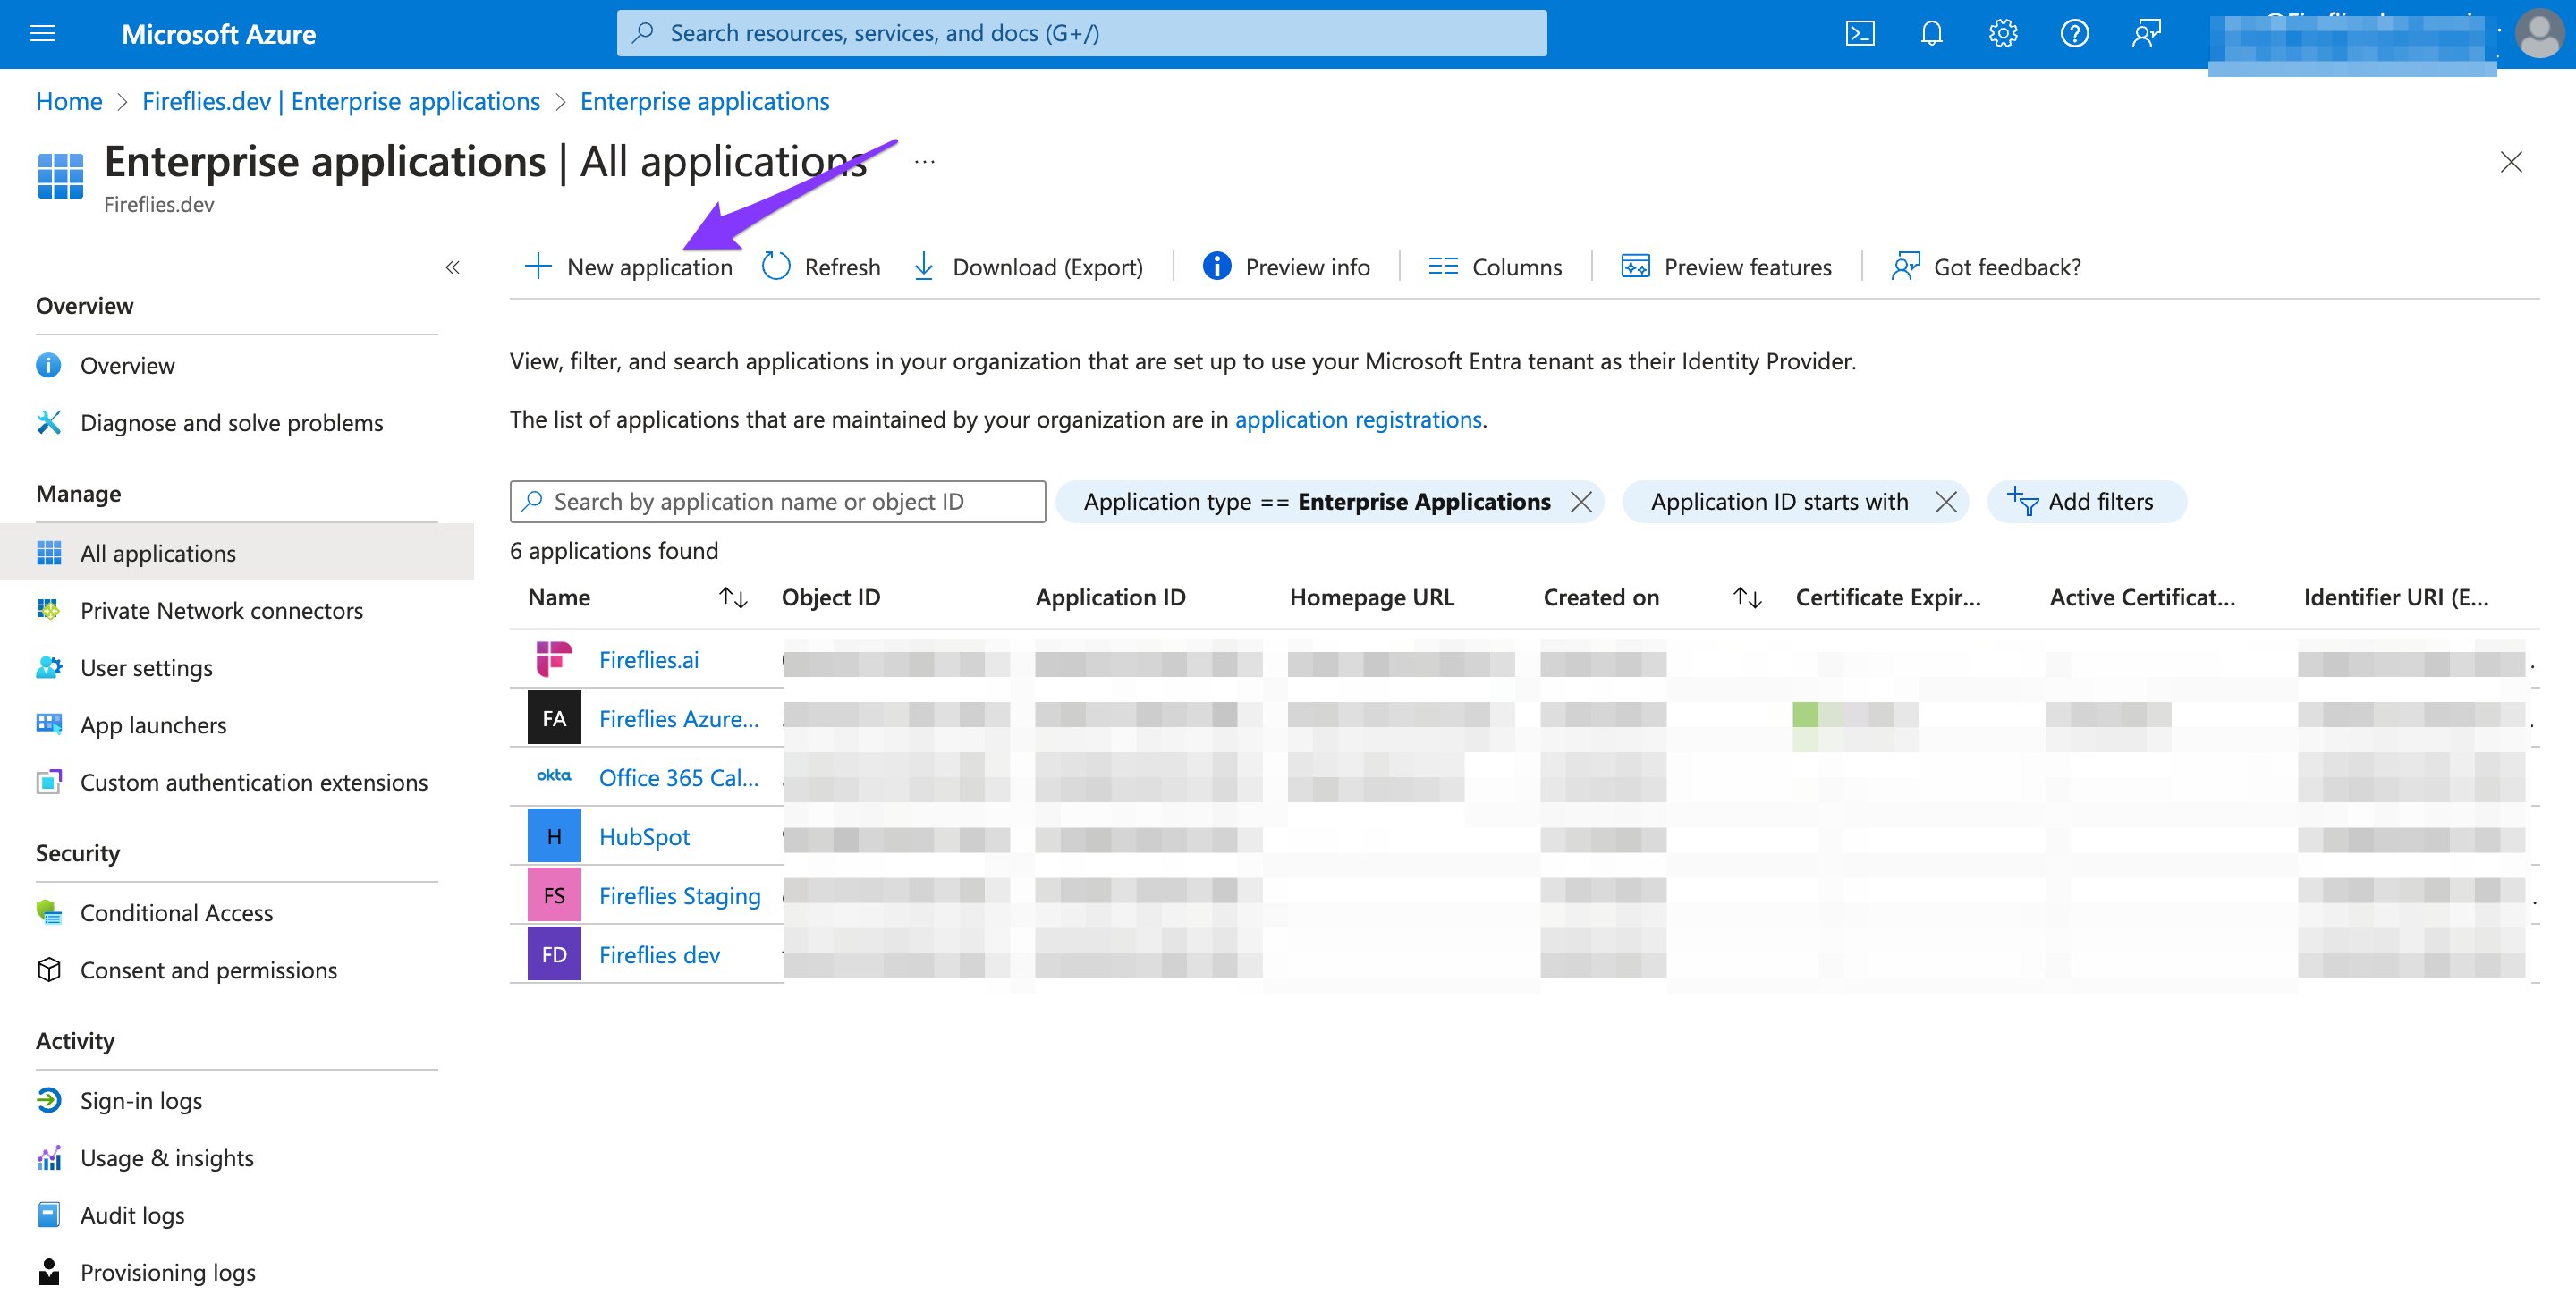
- Enter the following details:
- Name: Acme Logistics
- Select the (Non-gallery) option from the radio box and click Create.
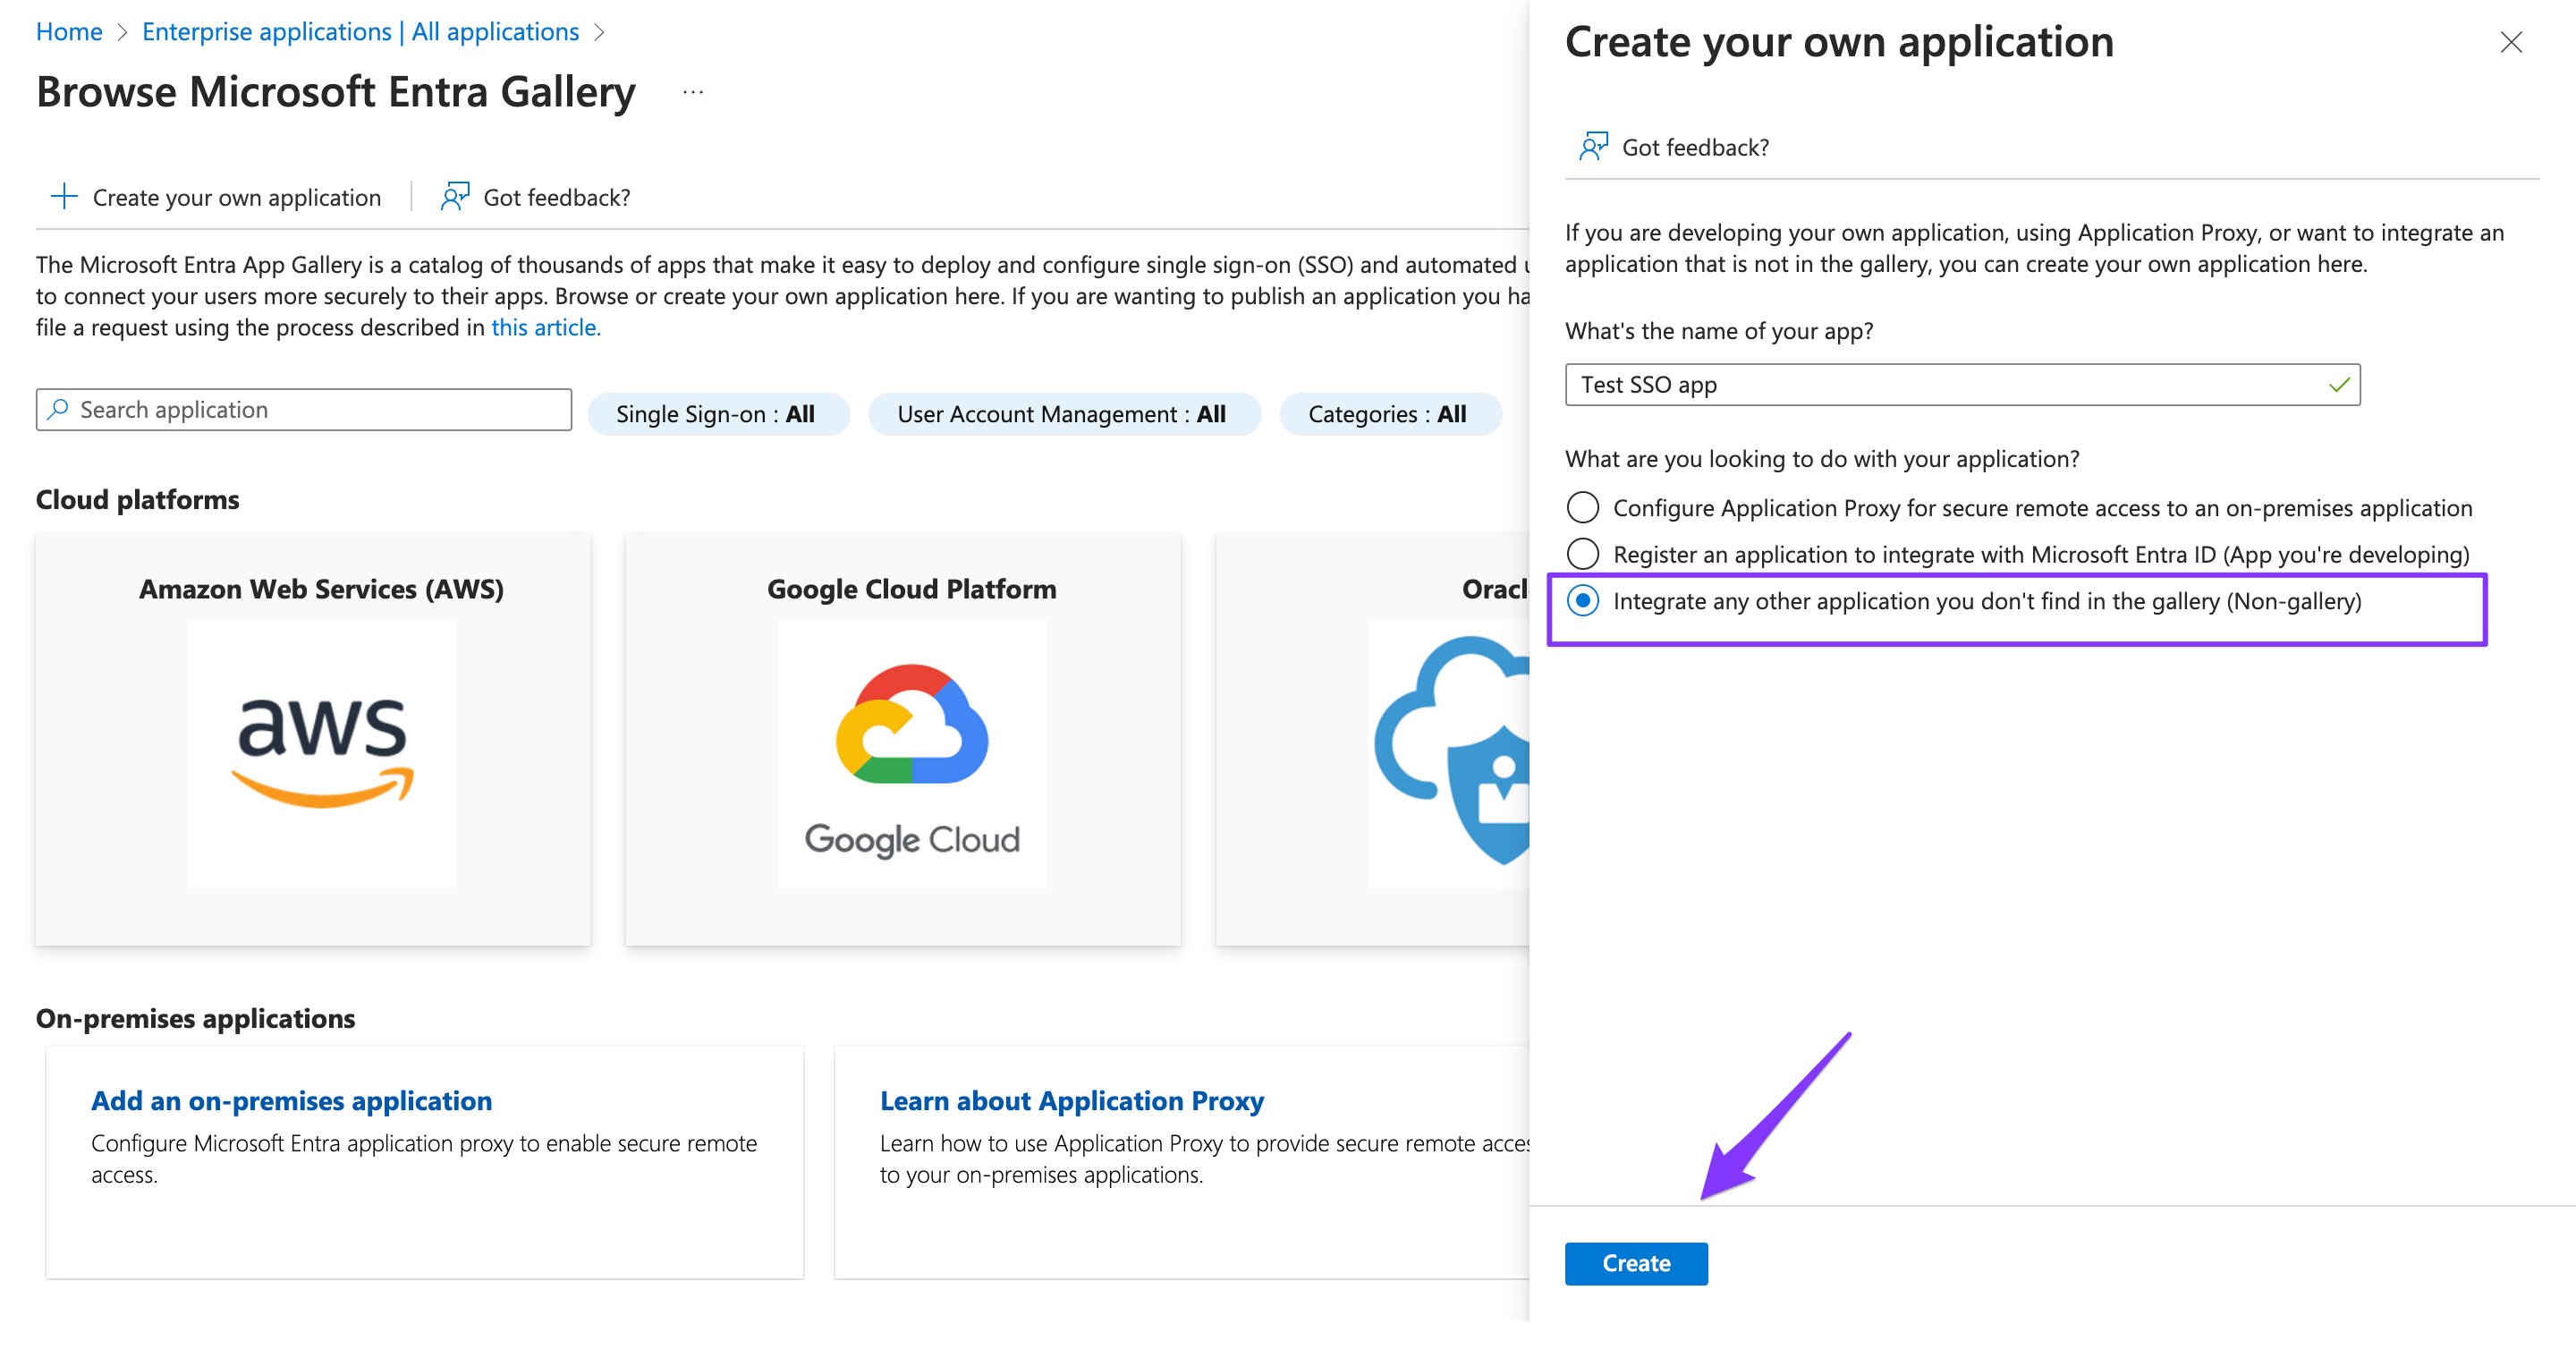
- Register: Click on Create to create the application.
Step 2: Configure SSO in Azure AD
-
Navigate to the Registered Application:
- Find and select the application from the App registrations list.
-
Set Up SSO:
- In the left menu, click on Single sign-on.
- Select SAML as the SSO method.
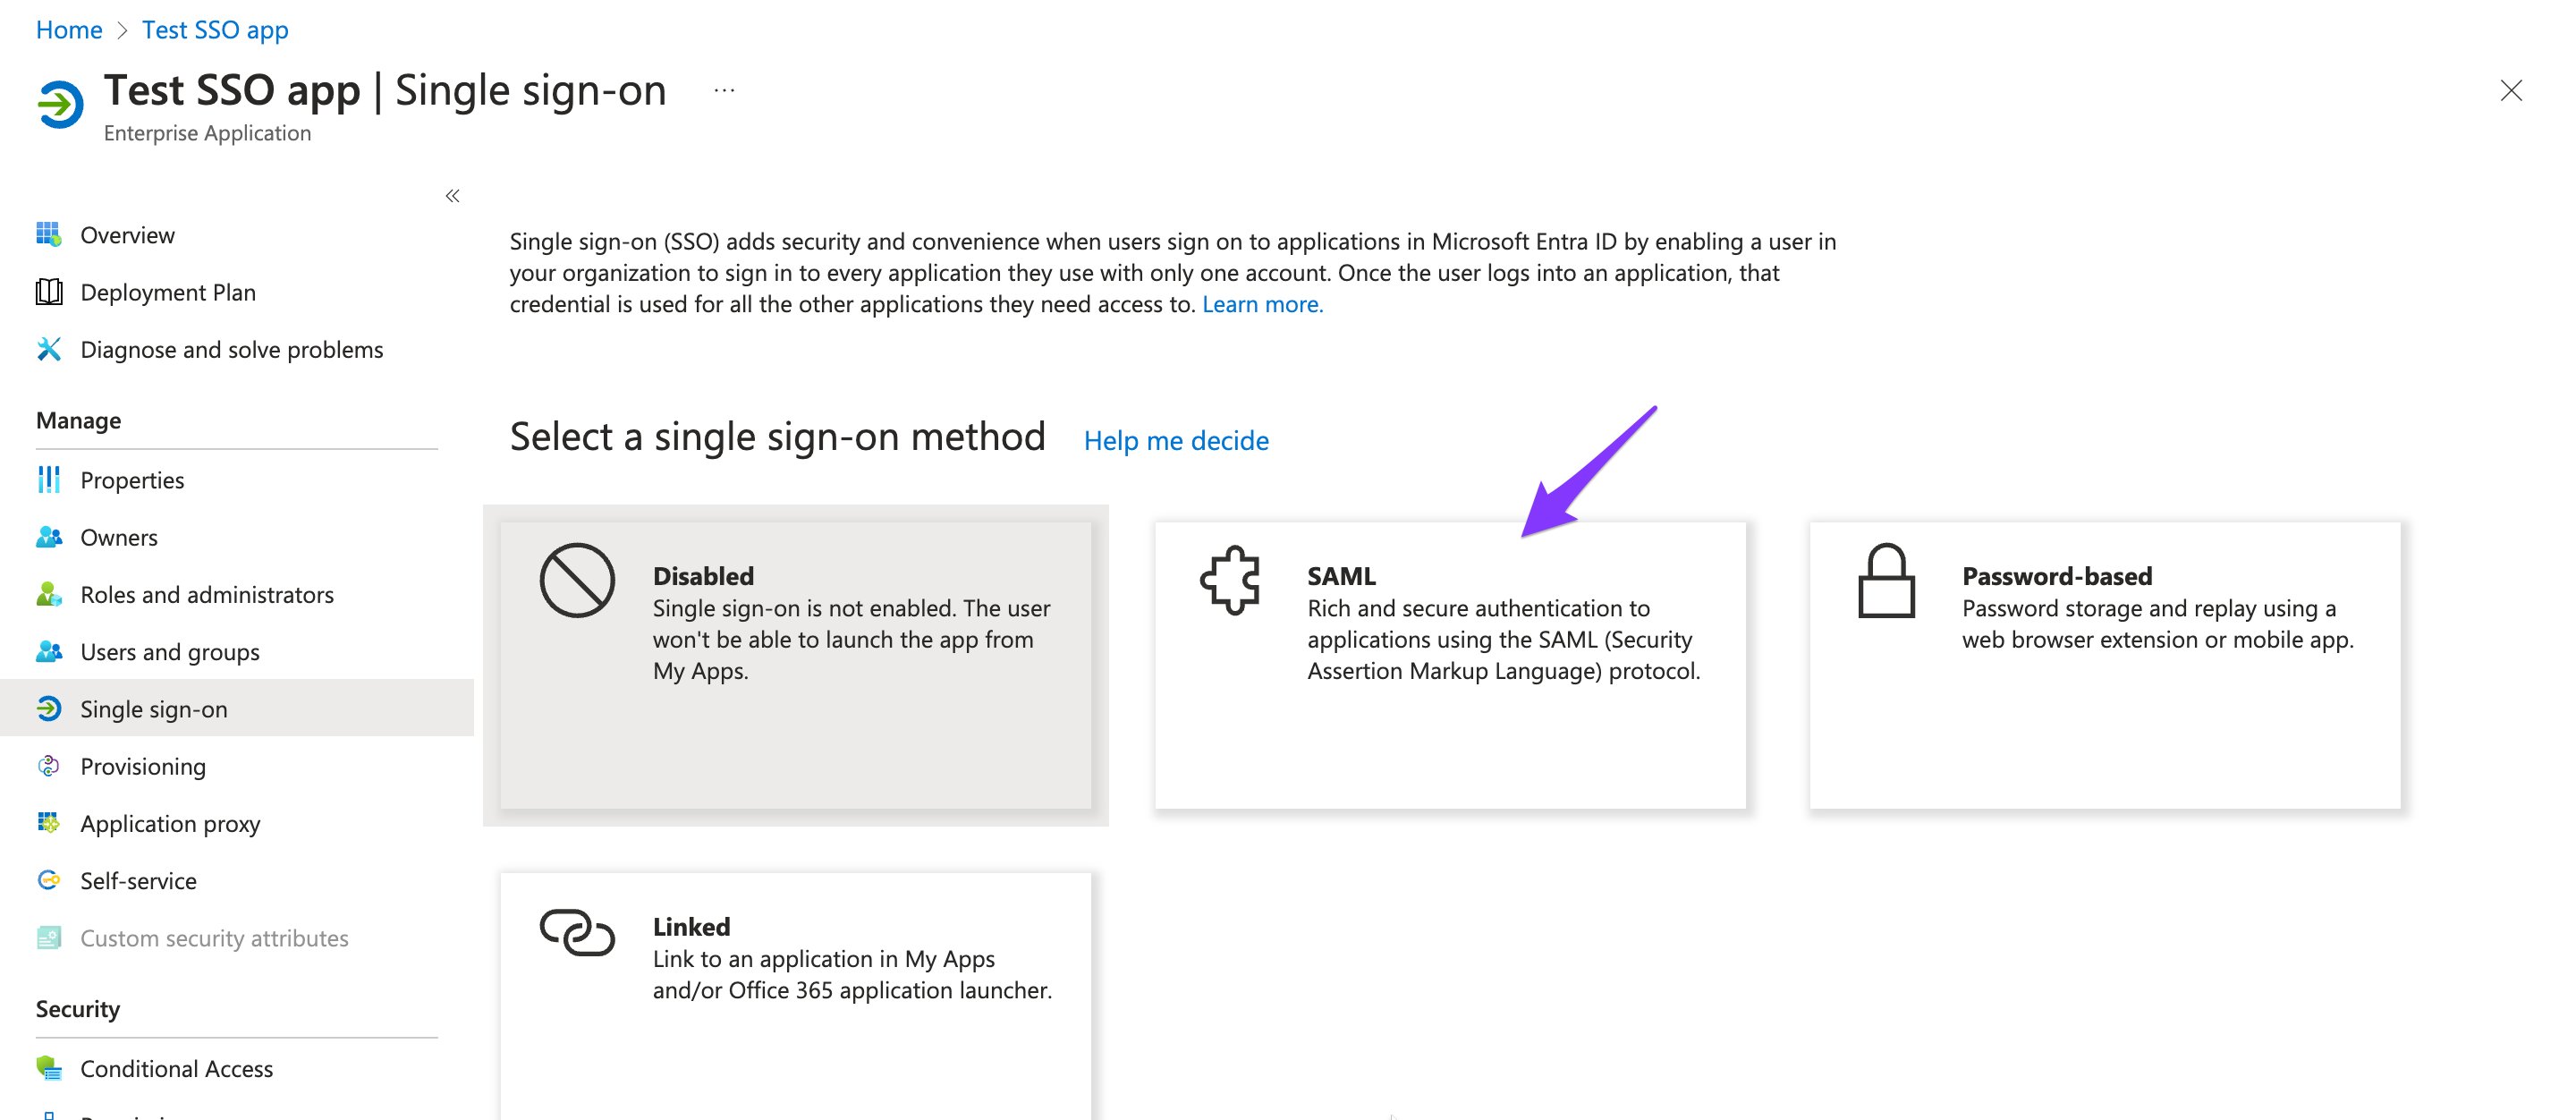
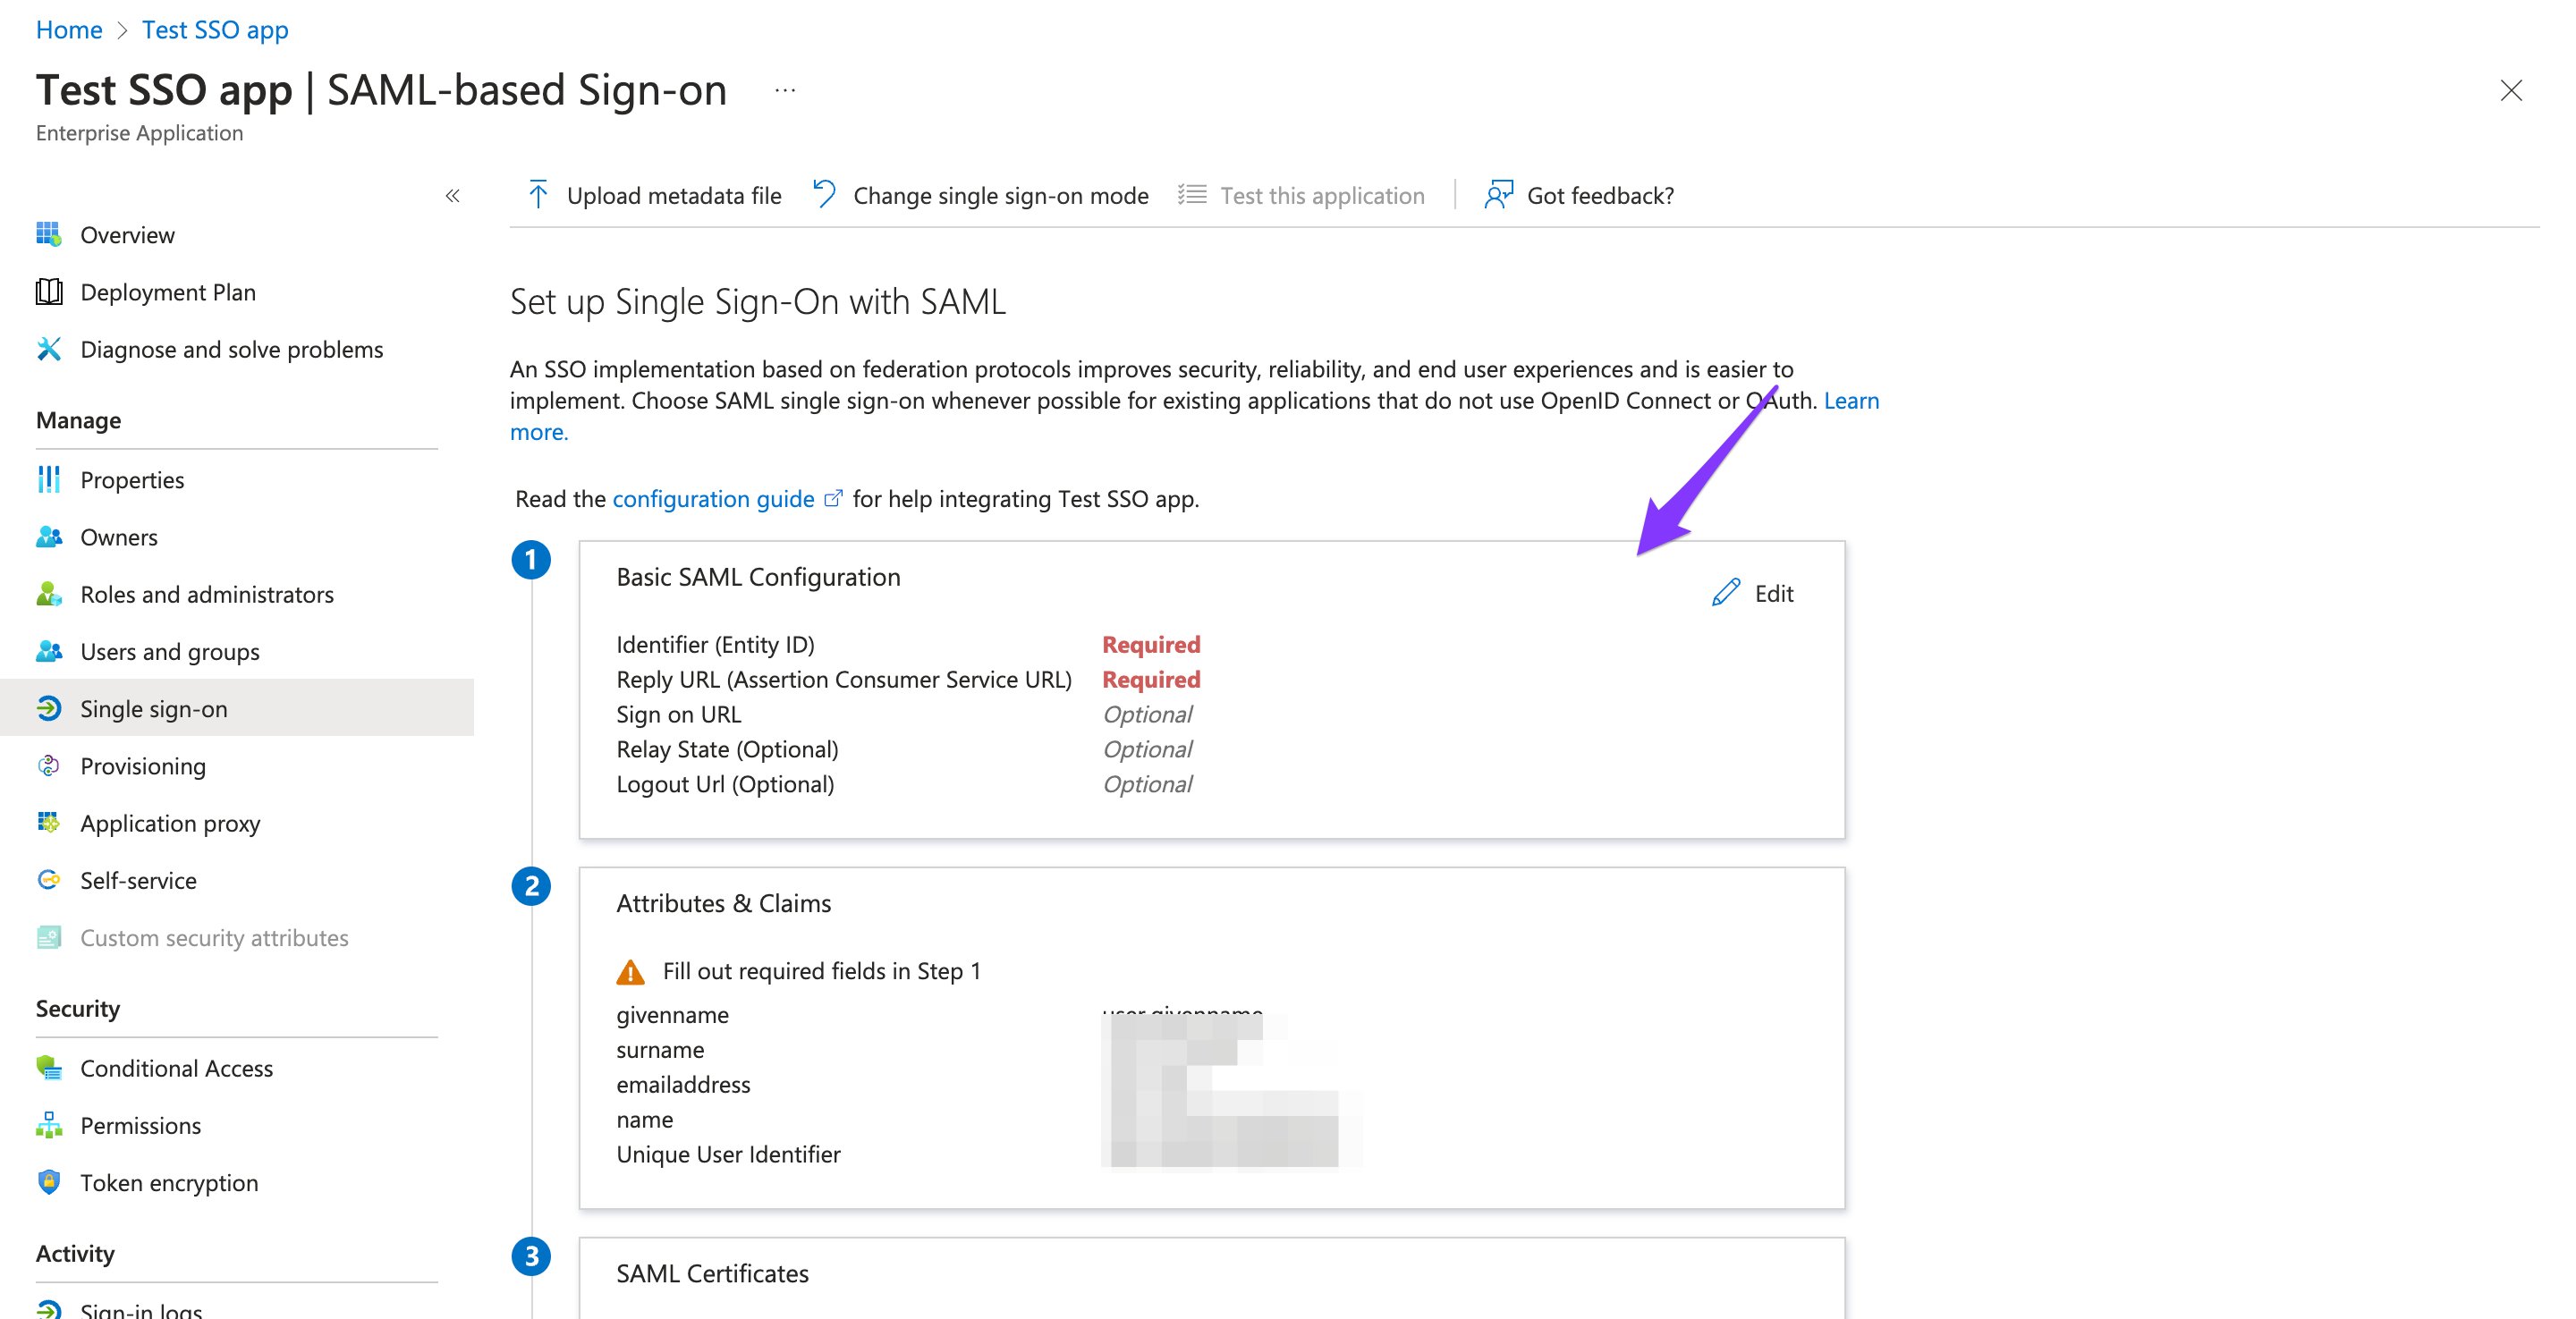
- Basic SAML Configuration:
- In the Basic SAML Configuration section, click on Edit and provide the following information:
-
Enter a unique ID. Note: This ID will be used in the saml.config file for the service provider name. Therefore, note the ID. For e.g: you can enter the ID as
https://your-app-url.com - Next, click Add reply URL.
-
Enter the application callback URL where the response will be posted. For now, you can enter a dummy URL e.g.
https://your-app-url.com/auth/sso - Select Save. Close the Basic SAML Configuration page.
- Now scroll down to the “Set up” section for your app. Copy the Login URL. You will need this URL in the web portal.
-
SAML Signing Certificate:
- Download the Certificate (Base64) by clicking on the Download button. This certificate will be used in the platform for SSO configuration.
Step 3: Configure the platform for SSO
- Log into the web portal: Access the settings menu.
-
Navigate to SSO Settings:
- Go to Setting ➝ Integration ➝ Azure SSO Configuration.
-
Enter SSO Details:
- Paste the Login URL that you copied from Azure.
- Upload the .cer file that you downloaded from Azure
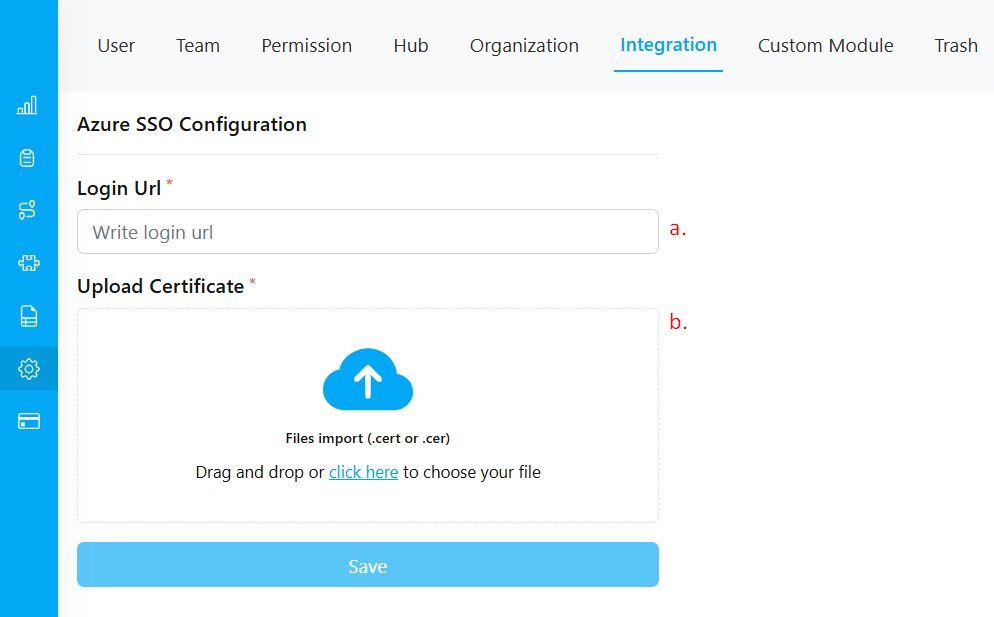
- After entering the required details, click on Save to apply the settings.
Step 4: Registering Users from Azure
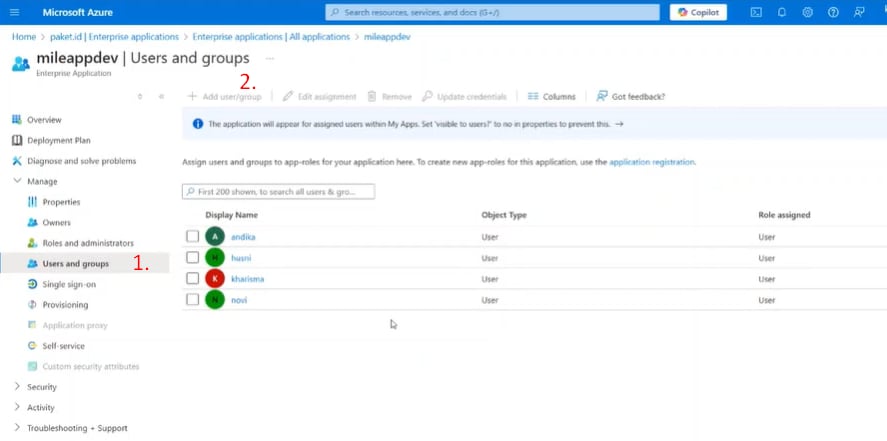
Steps:
- Open the Users and Groups menu.
- Click Add User/Group to register users who can access the platform.
- Only registered users in Azure can log in to the platform using their Azure accounts.
Login via Microsoft Account with Azure SSO
1. Complete the Setup Process
After successfully completing the setup steps for Azure SSO, you can proceed to log in to the platform using your Microsoft account.2. Access the Office Portal
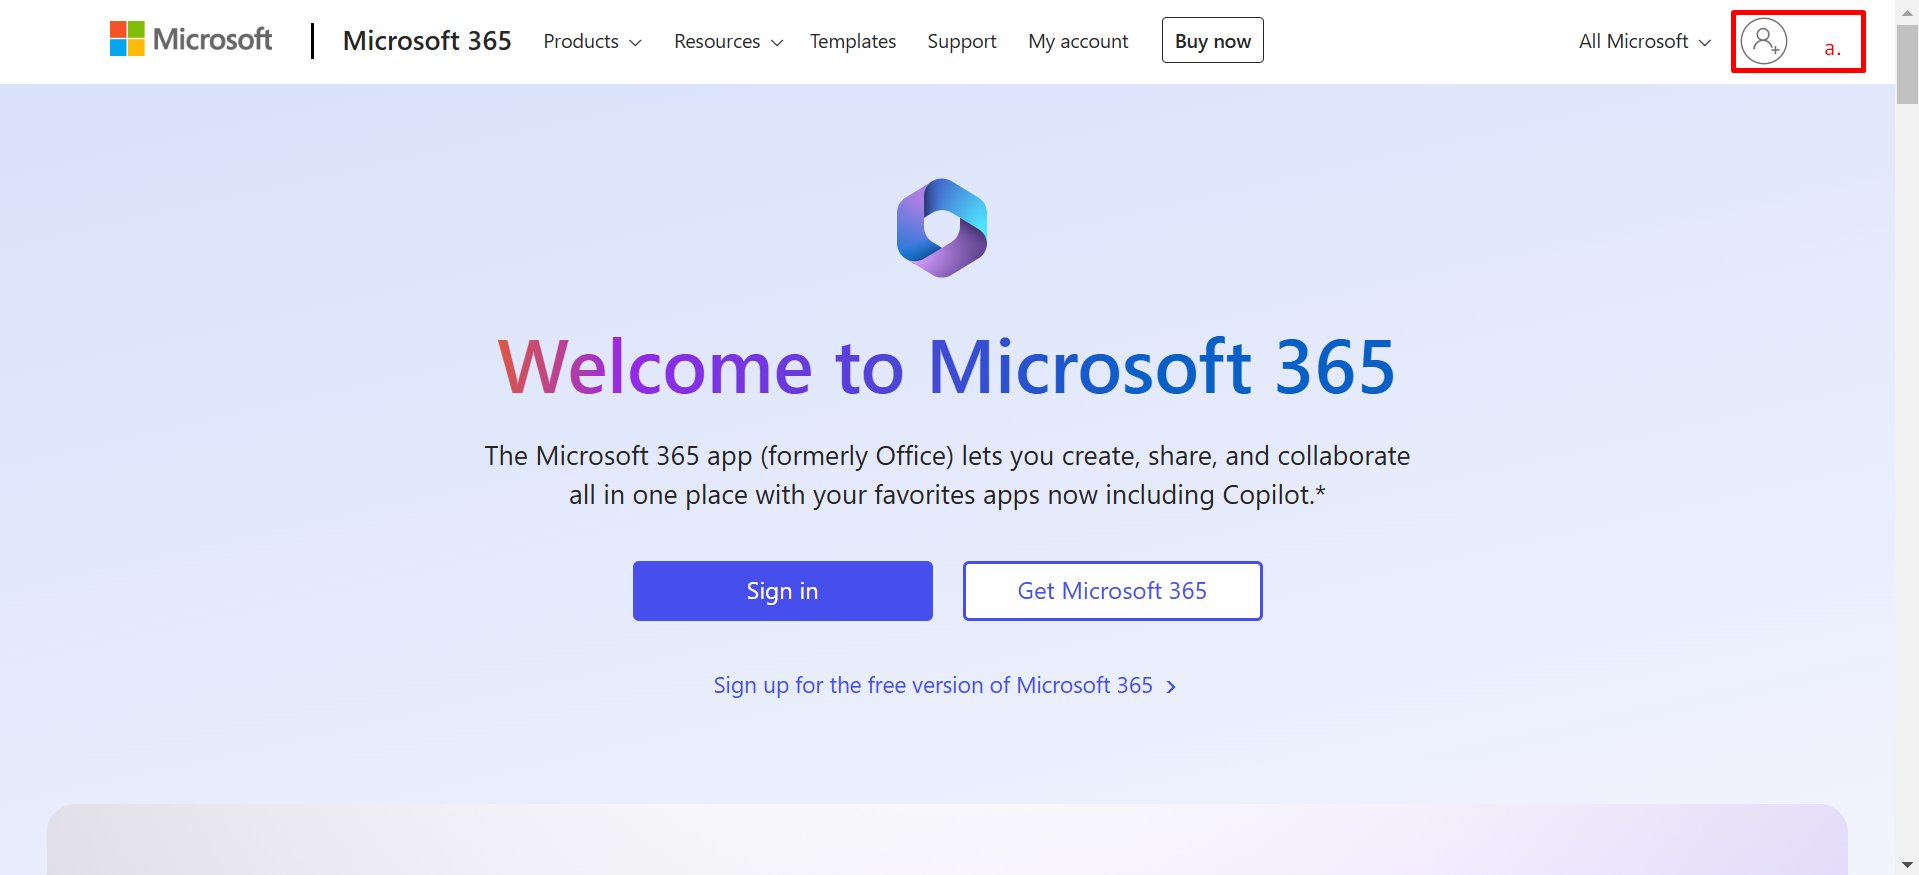
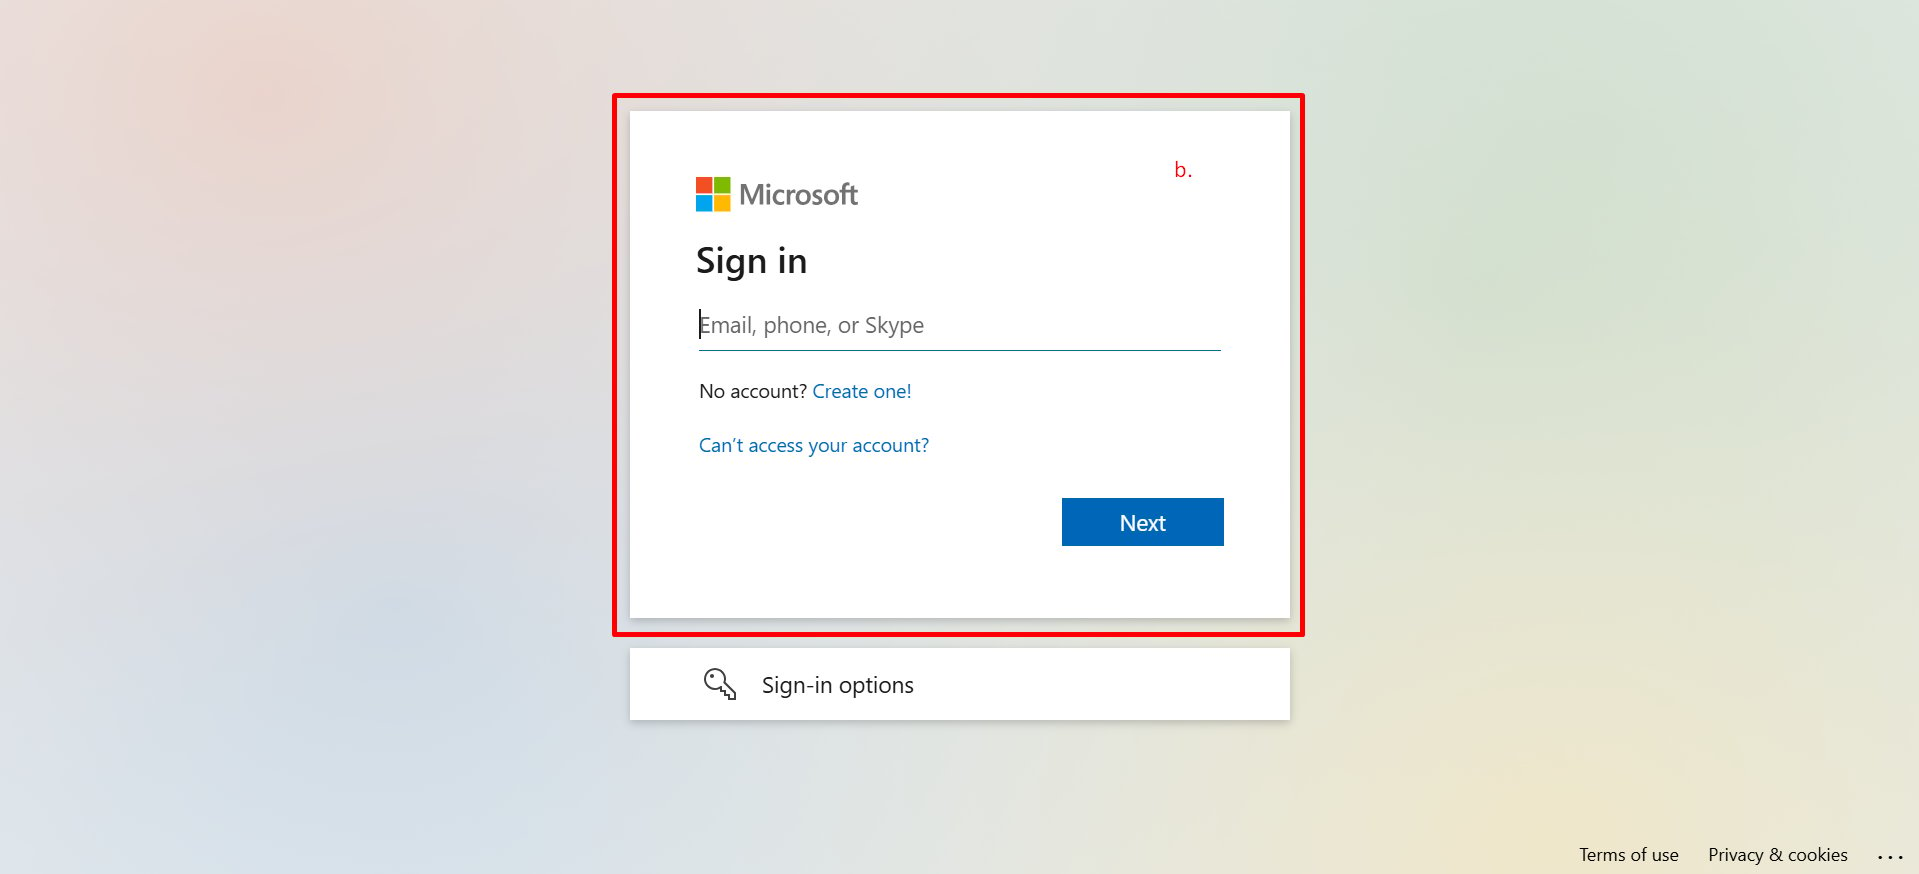
- Open the Microsoft Office web portal at https://www.office.com/.
- Log in with your Microsoft account credentials.
3. Navigate to the web portal
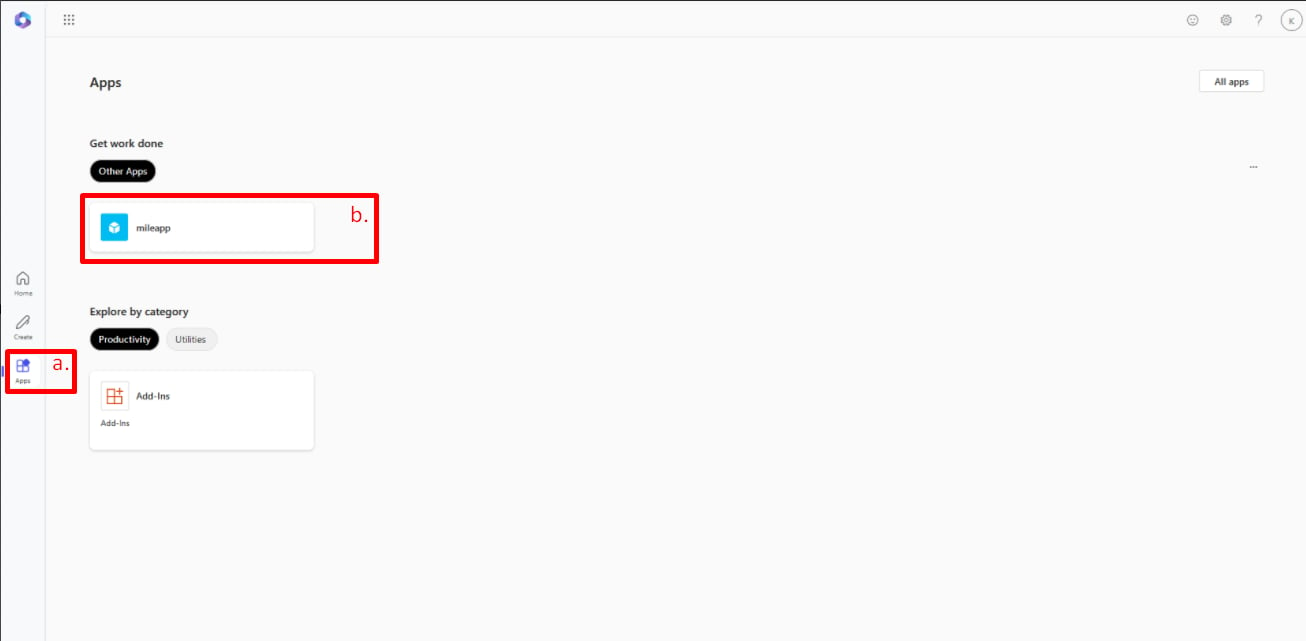
- Once logged in, click on the App Launcher (the grid icon) on the left-hand side of the screen.
- Select Acme Logistics from the list of available applications to access the web platform.
Notes
- If you already have an account and want to integrate it with Azure SSO, ensure that the email registered in Azure AD matches the email used in your account.
- If the email registered in Azure AD differs from the email registered in the platform, it will be considered a separate account.
- If a user has been invited through the platform but has not completed the verification process via email and is then registered in Azure using the same email, they cannot log in to the platform until the verification is complete. You can complete the verification process via email or delete the unverified user in the User Settings menu to allow access.
Tips
- Ensure you have View and Create Integration permissions to configure the integration.
- You can still set a password in the platform even after your account is registered in Azure. The password can be used for logging in through the login page.