Required permission:
- View task
- Do task
When Do task is offered
Do task appears in a row’s Task actions menu only when all of these are true:- The task is assigned to you, the person signed in to the web app.
- The task is Ongoing, not Unassigned or Done.
- The task’s start time has passed. Before it, a message says when the task will start.
- The task’s end time has not passed. After it, the task has expired: update its end time first.
- The row is not a subtask of a subflow.
Step 1: Open the task
Open Activities › Task, find the task, click Task actions and choose Do task.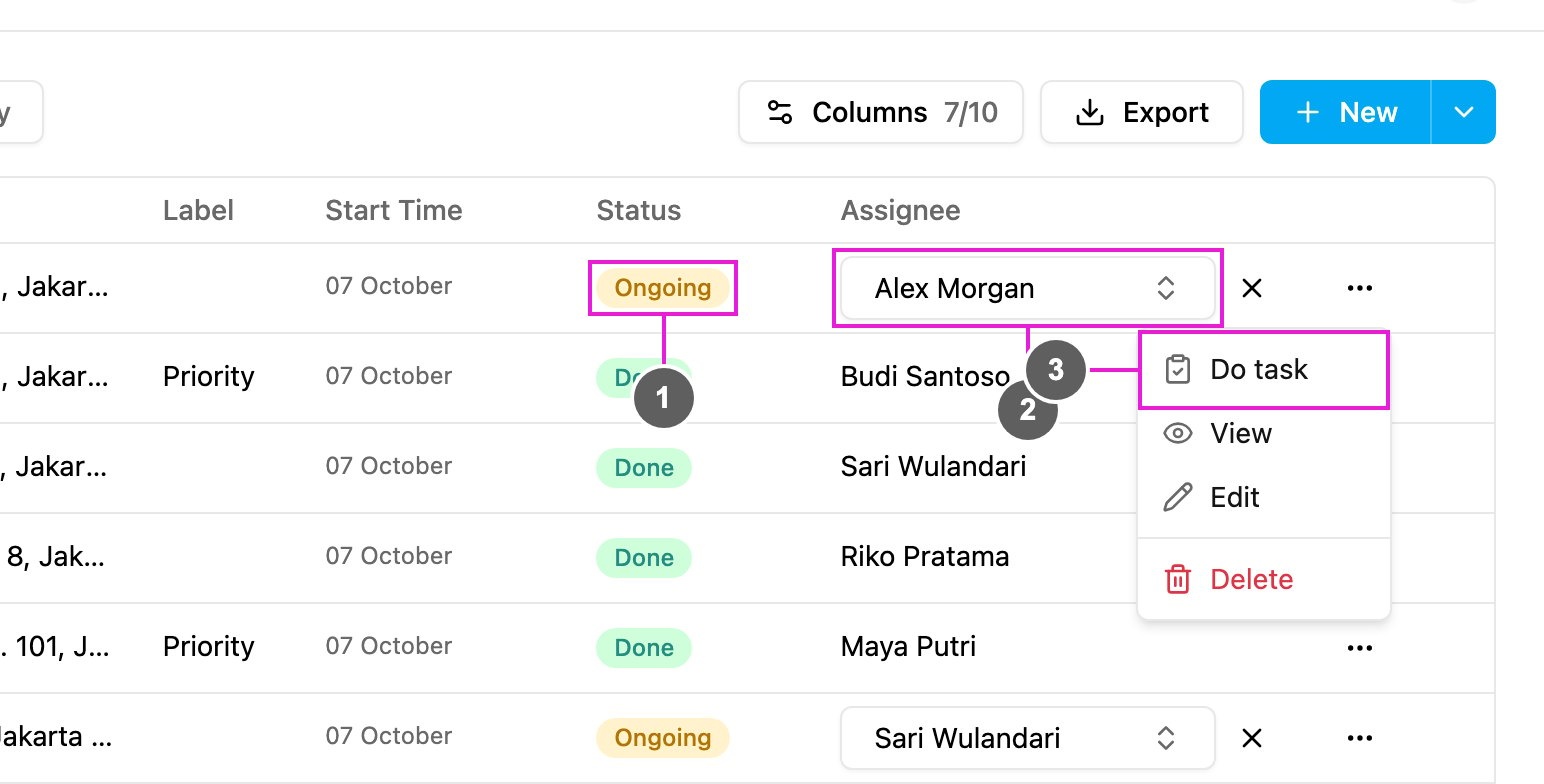
- Status: the task must be Ongoing.
- Assignee: your own name must be among the assignees.
- Do task: open the task’s form.
Step 2: Fill in each page
Complete this task opens with the same pages, fields and checks the field worker sees on the field app, laid out like the field app’s screen. What you fill in is saved on the task exactly as a field app submission.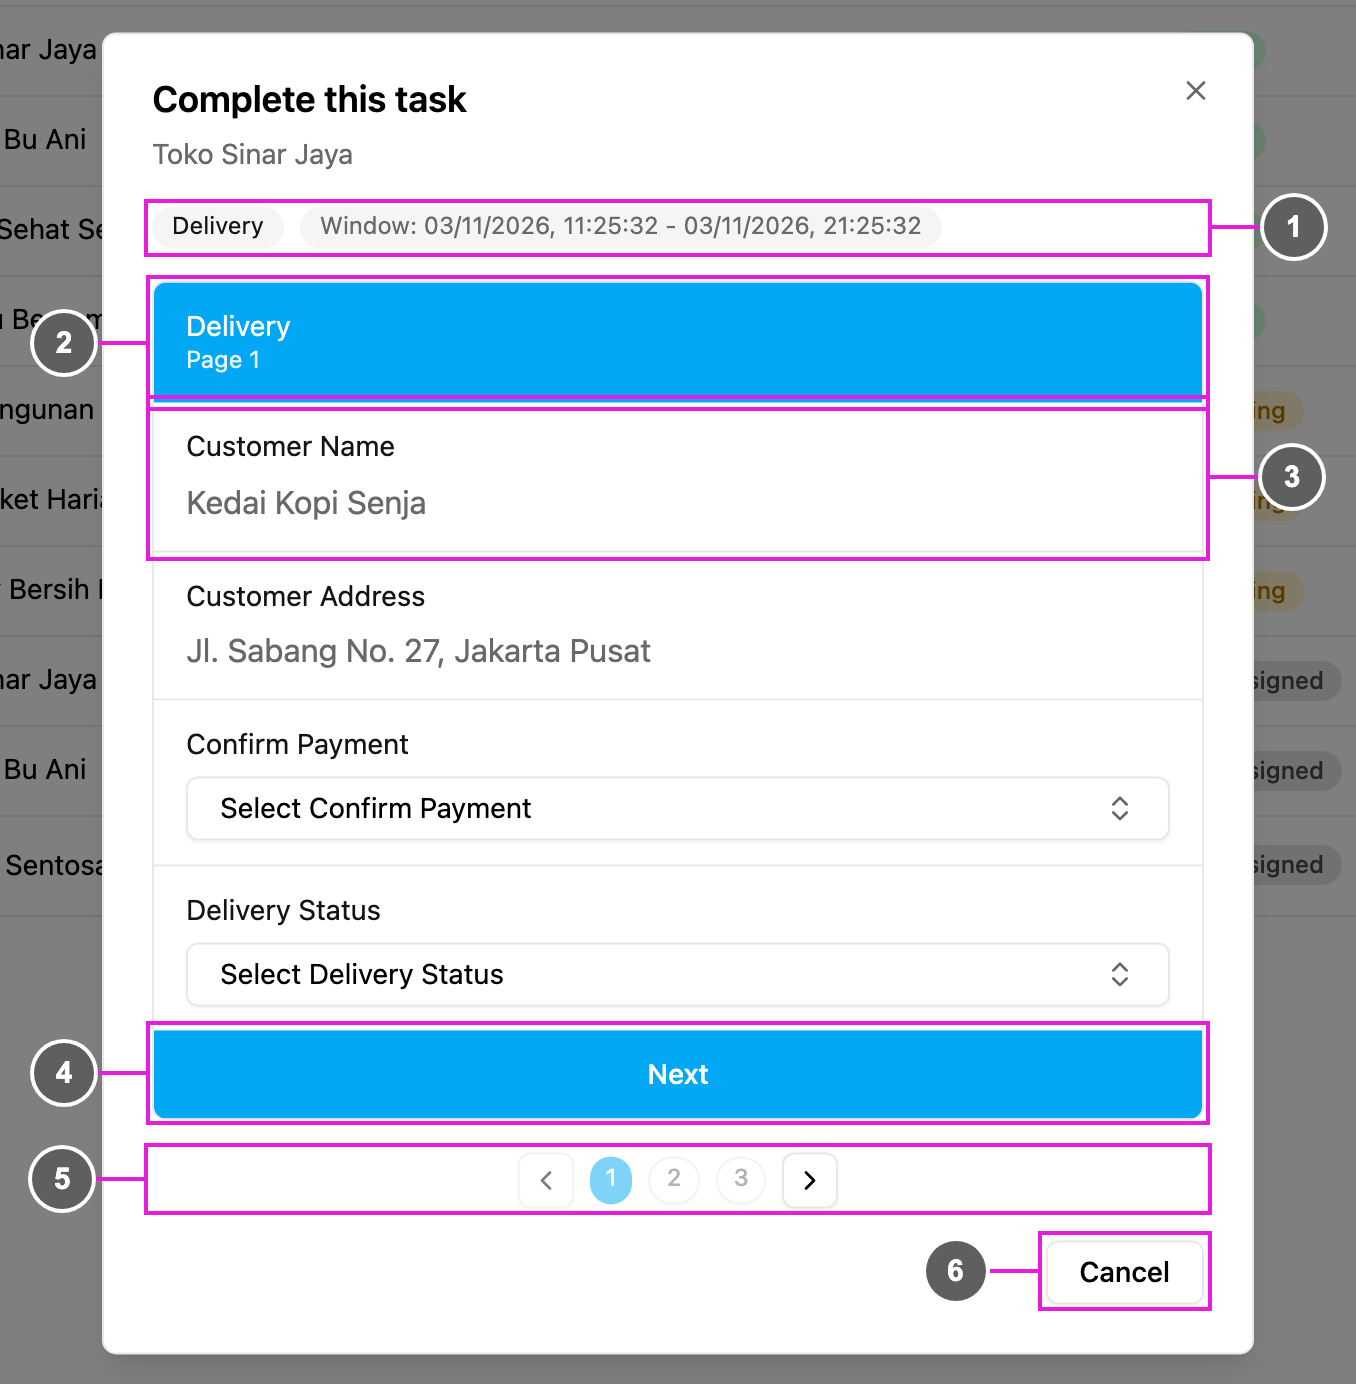
- Task type and window: the task’s task type and its time window.
- Page header: the task type and the page you are on, such as Page 1. A task type can have one page or many, in the order set in the task type builder.
- Fields: every component of the current page, one under the other, such as inputs, photos, signatures, lists and bills. Fields already filled in on the initial page or earlier pages show their values. Required fields must be filled in before you move on.
- Next: check this page and go to the next one.
- Pager: one number per page, with arrows on each side. It is shown only when the task type has more than one page.
- Cancel: close the form. If you have typed anything, Discard changes? asks before your input is lost.
Moving between pages
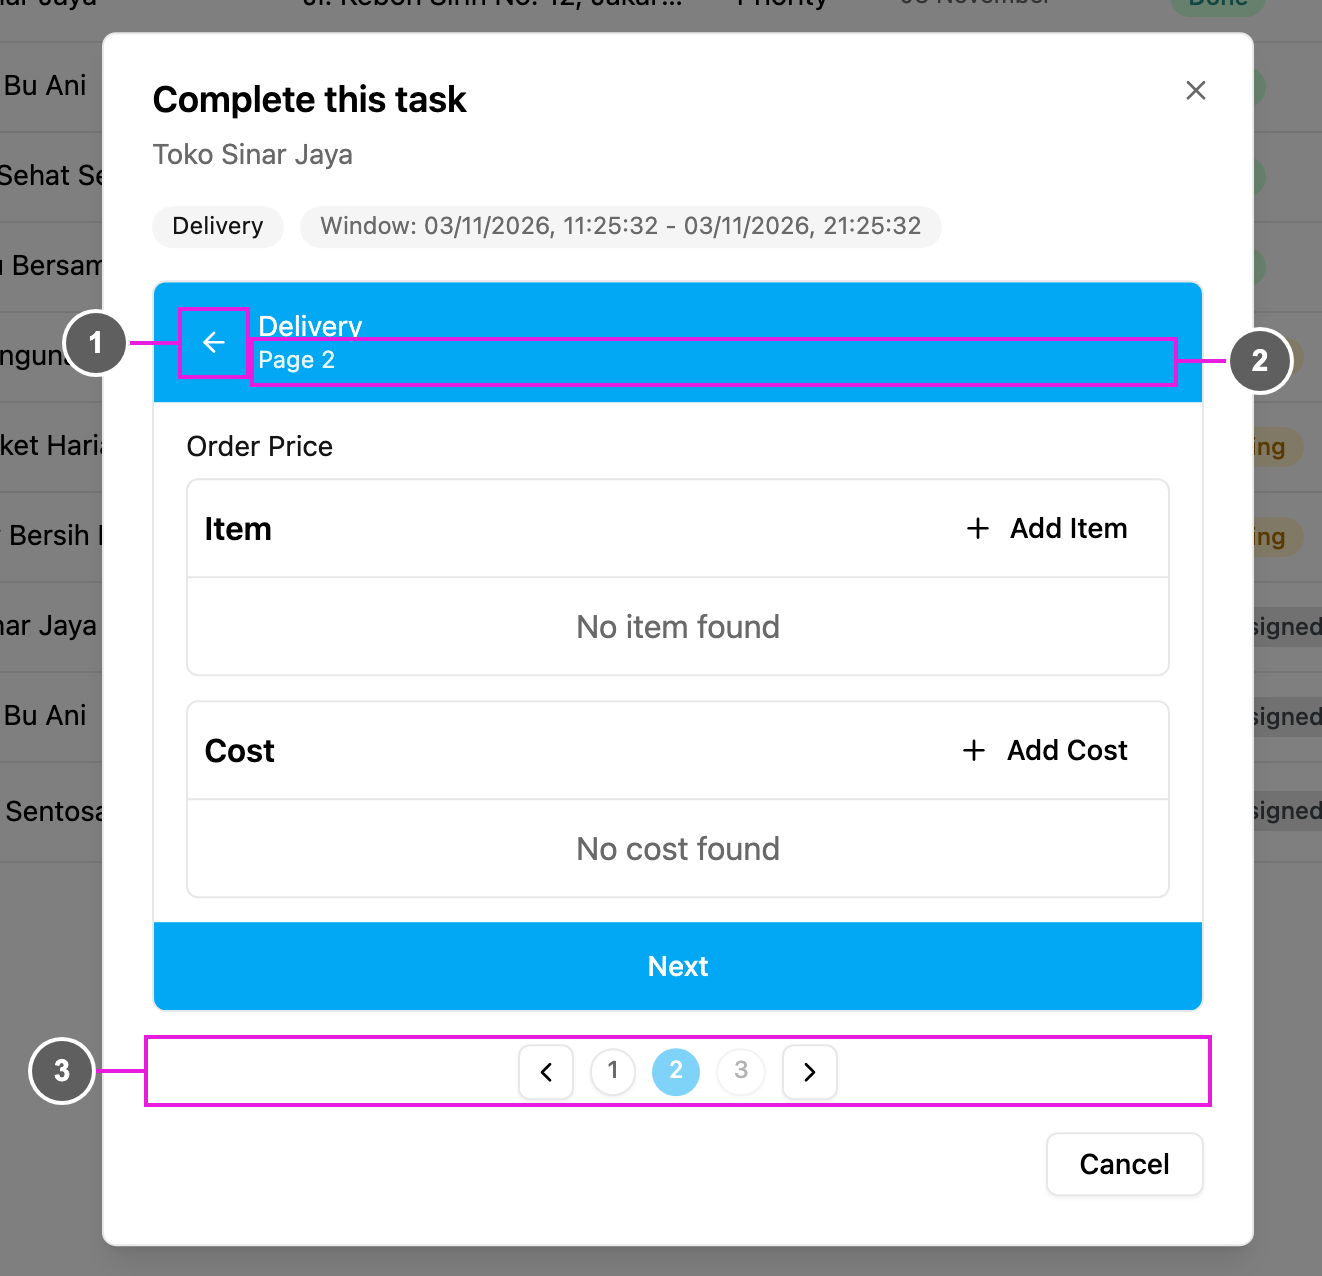
- Back: the arrow in the page header returns to the previous page. It is not shown on the first page.
- Page name: the page you are on now.
- Pager: click an earlier number to go back to that page; what you typed there is kept. The right arrow moves forward only after the current page passes its checks, the same as Next. You can’t jump ahead to a later page.
Step 3: Finish the task
On the last page, Next becomes Complete. This is usually where you add the proof, such as a photo or a signature. Photos show as tiles, and the signature pad fills the width of the form.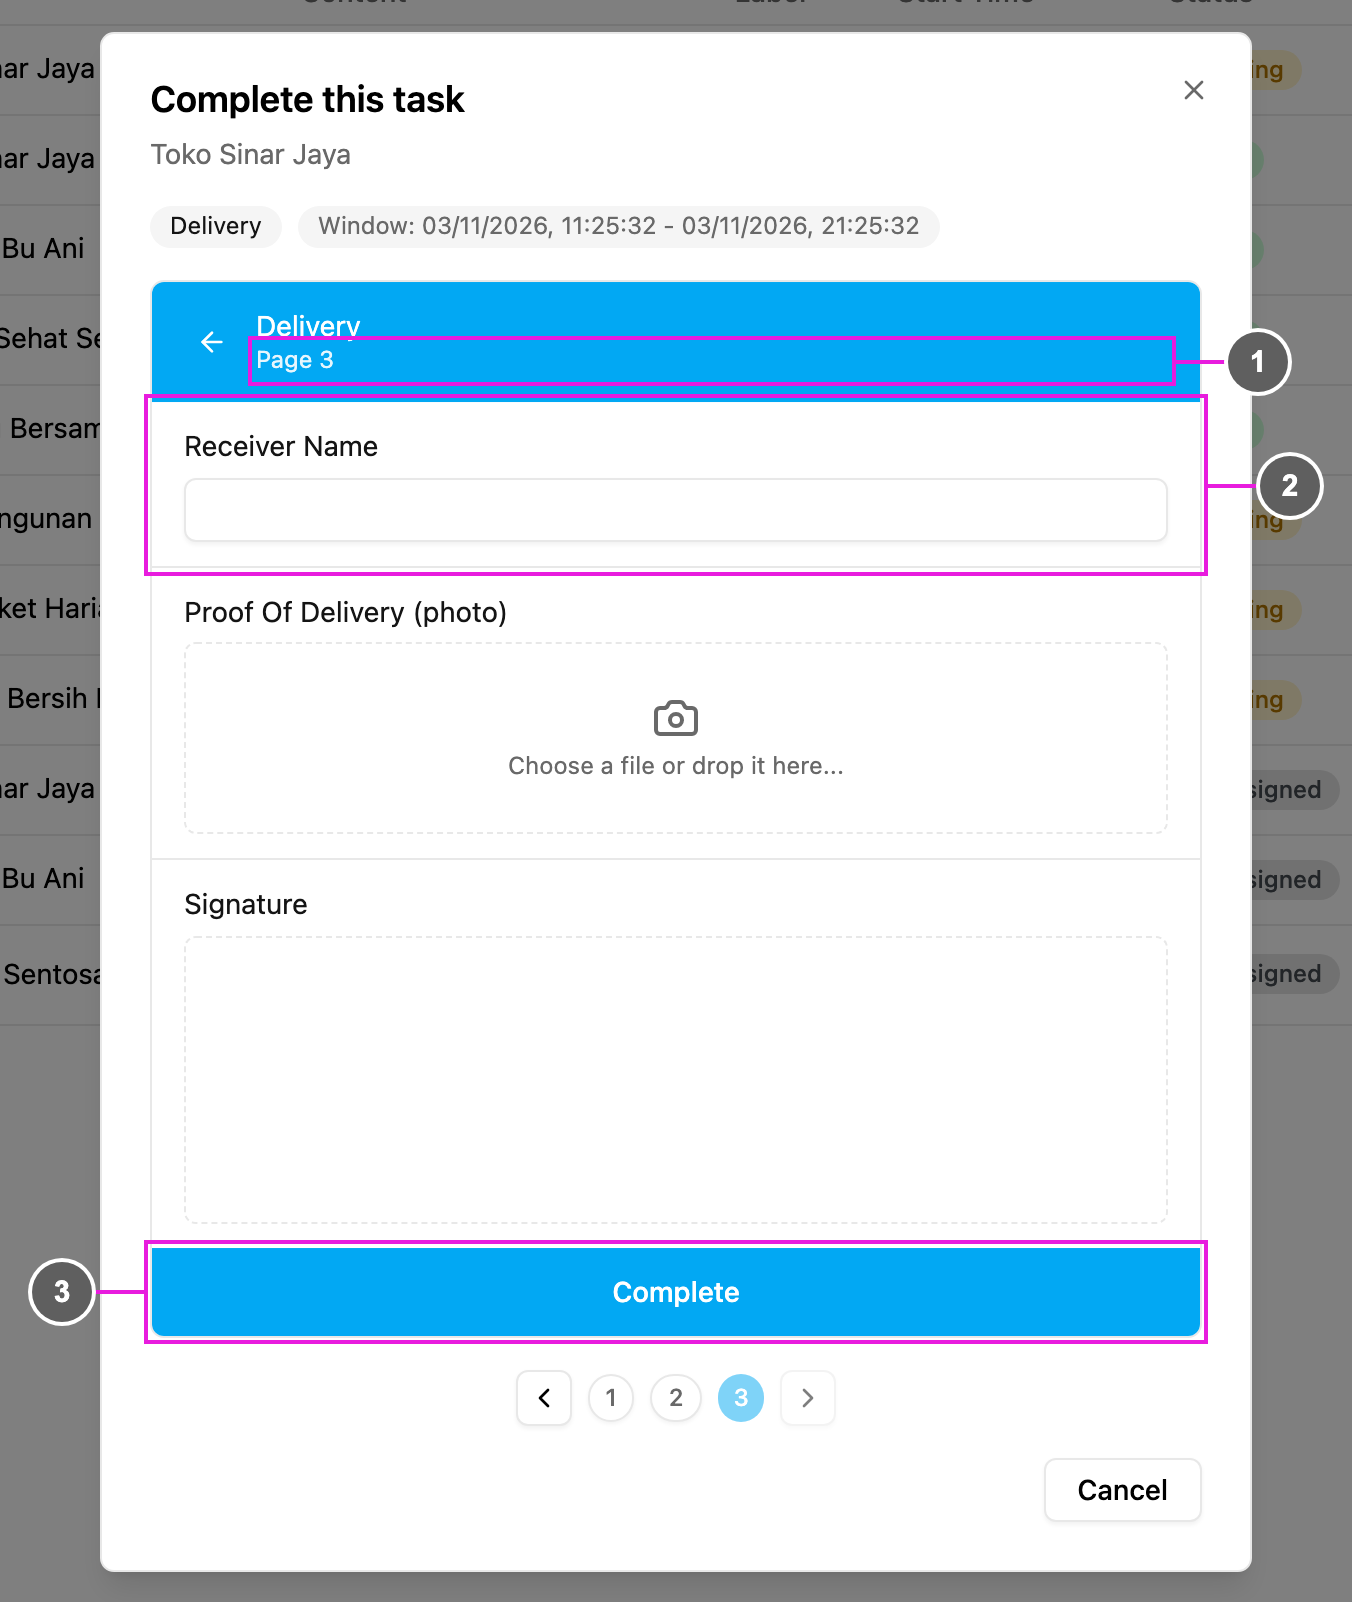
- Last page: the final page of the task type.
- Fields: the final fields. Fill in every required one.
- Complete: finish the task.
After the task is done
- The task’s status becomes Done, and Do task no longer appears on it.
- Open the task to check what was saved: the done time, photos and files and the other values. See Viewing and Editing a Task.
- Done from shows WEB, so a task done on the web can be told apart from one done on the field app. Show the Done from column to see it in the list.
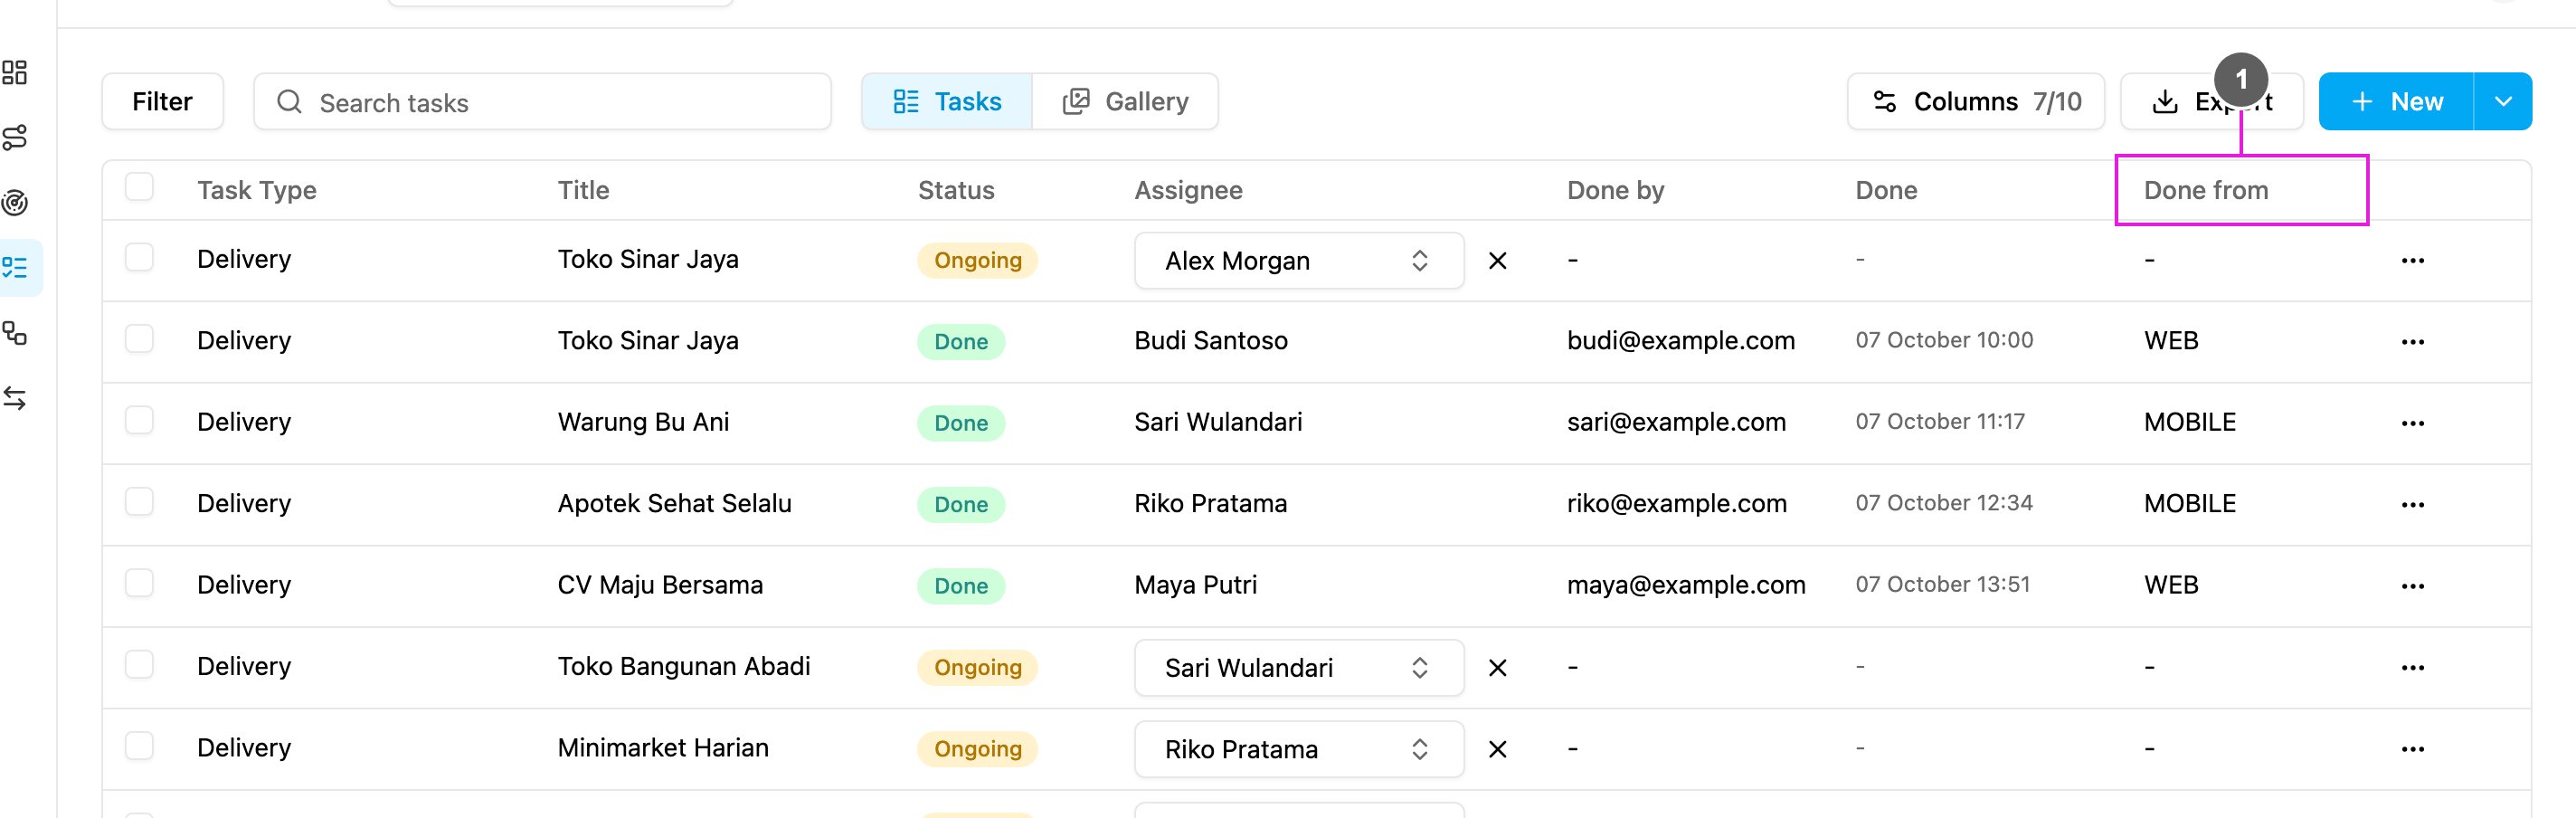
- Done from: WEB for a task finished on the web app.